NPS

Document (ehang-io.github.io)

一款轻量级、高性能、功能强大的内网穿透代理服务器

  • 几乎支持所有协议
  • 支持内网http代理、内网socks5代理、p2p等
  • 简洁但功能强大的WEB管理界面
  • 支持服务端、客户端同时控制
  • 扩展功能强大
  • 全平台兼容,一键注册为服务

安装

nps项目在2021年8月份左右停止了最后的更新,虽然有很多二开项目。

安装包安装

文档:Document

Github:ehang-io/nps: 一款轻量级、高性能、功能强…

https://cdn.ziyourufeng.eu.org/51hhh/img_bed/main/img/2025/02_21/image_0b176d2dcb7f5a2ffa7c7ac47ec92b83.png

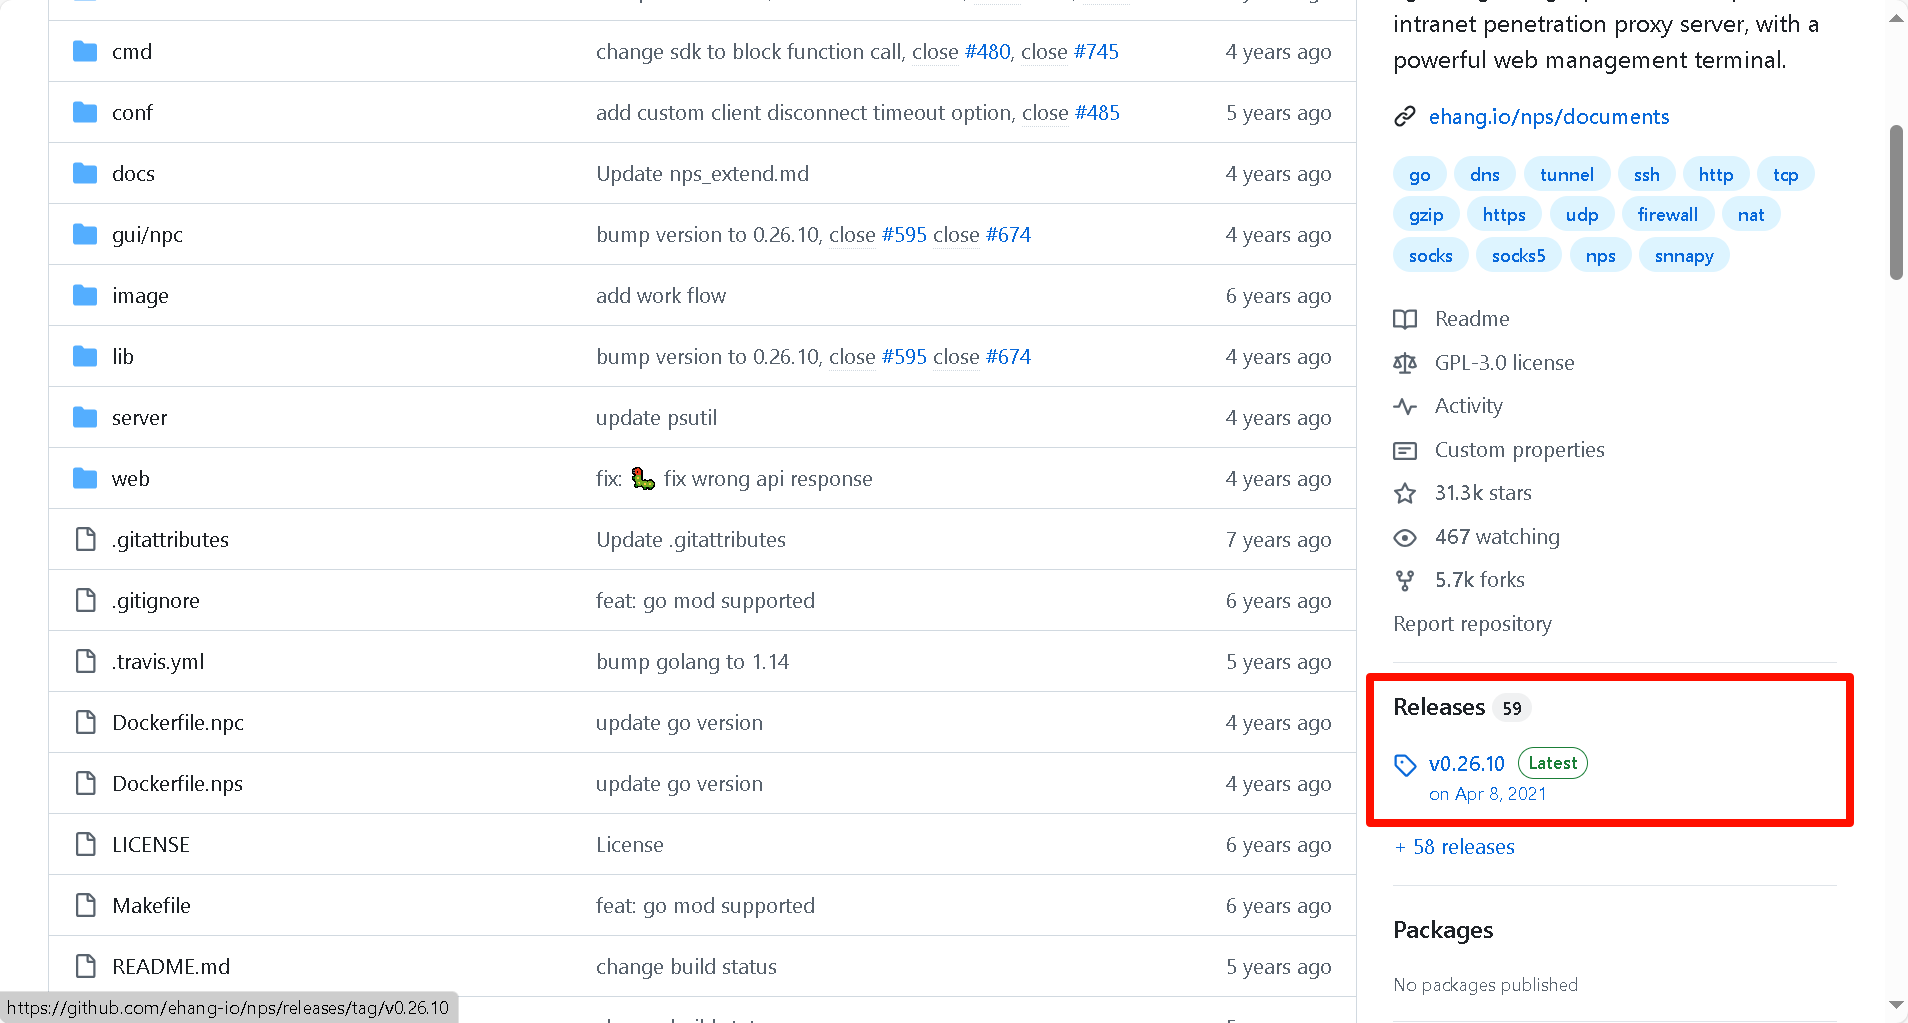
前往Release下载对应架构安装包(以Ubuntu20.04 x86_64 为例)

1
2
3
4
5
6
mkdir nps
cd nps
wget https://github.com/ehang-io/nps/releases/download/v0.26.10/linux_amd64_server.tar.gz
tar -zxvf linux_amd64_server.tar.gz
chmod +x nps
sudo ./nps install

mkdir创建nps文件夹

cd进入nps文件夹

wget下载对应架构安装包

tar解压压缩包

chmod赋予执行权限

nps安装

conf文件配置

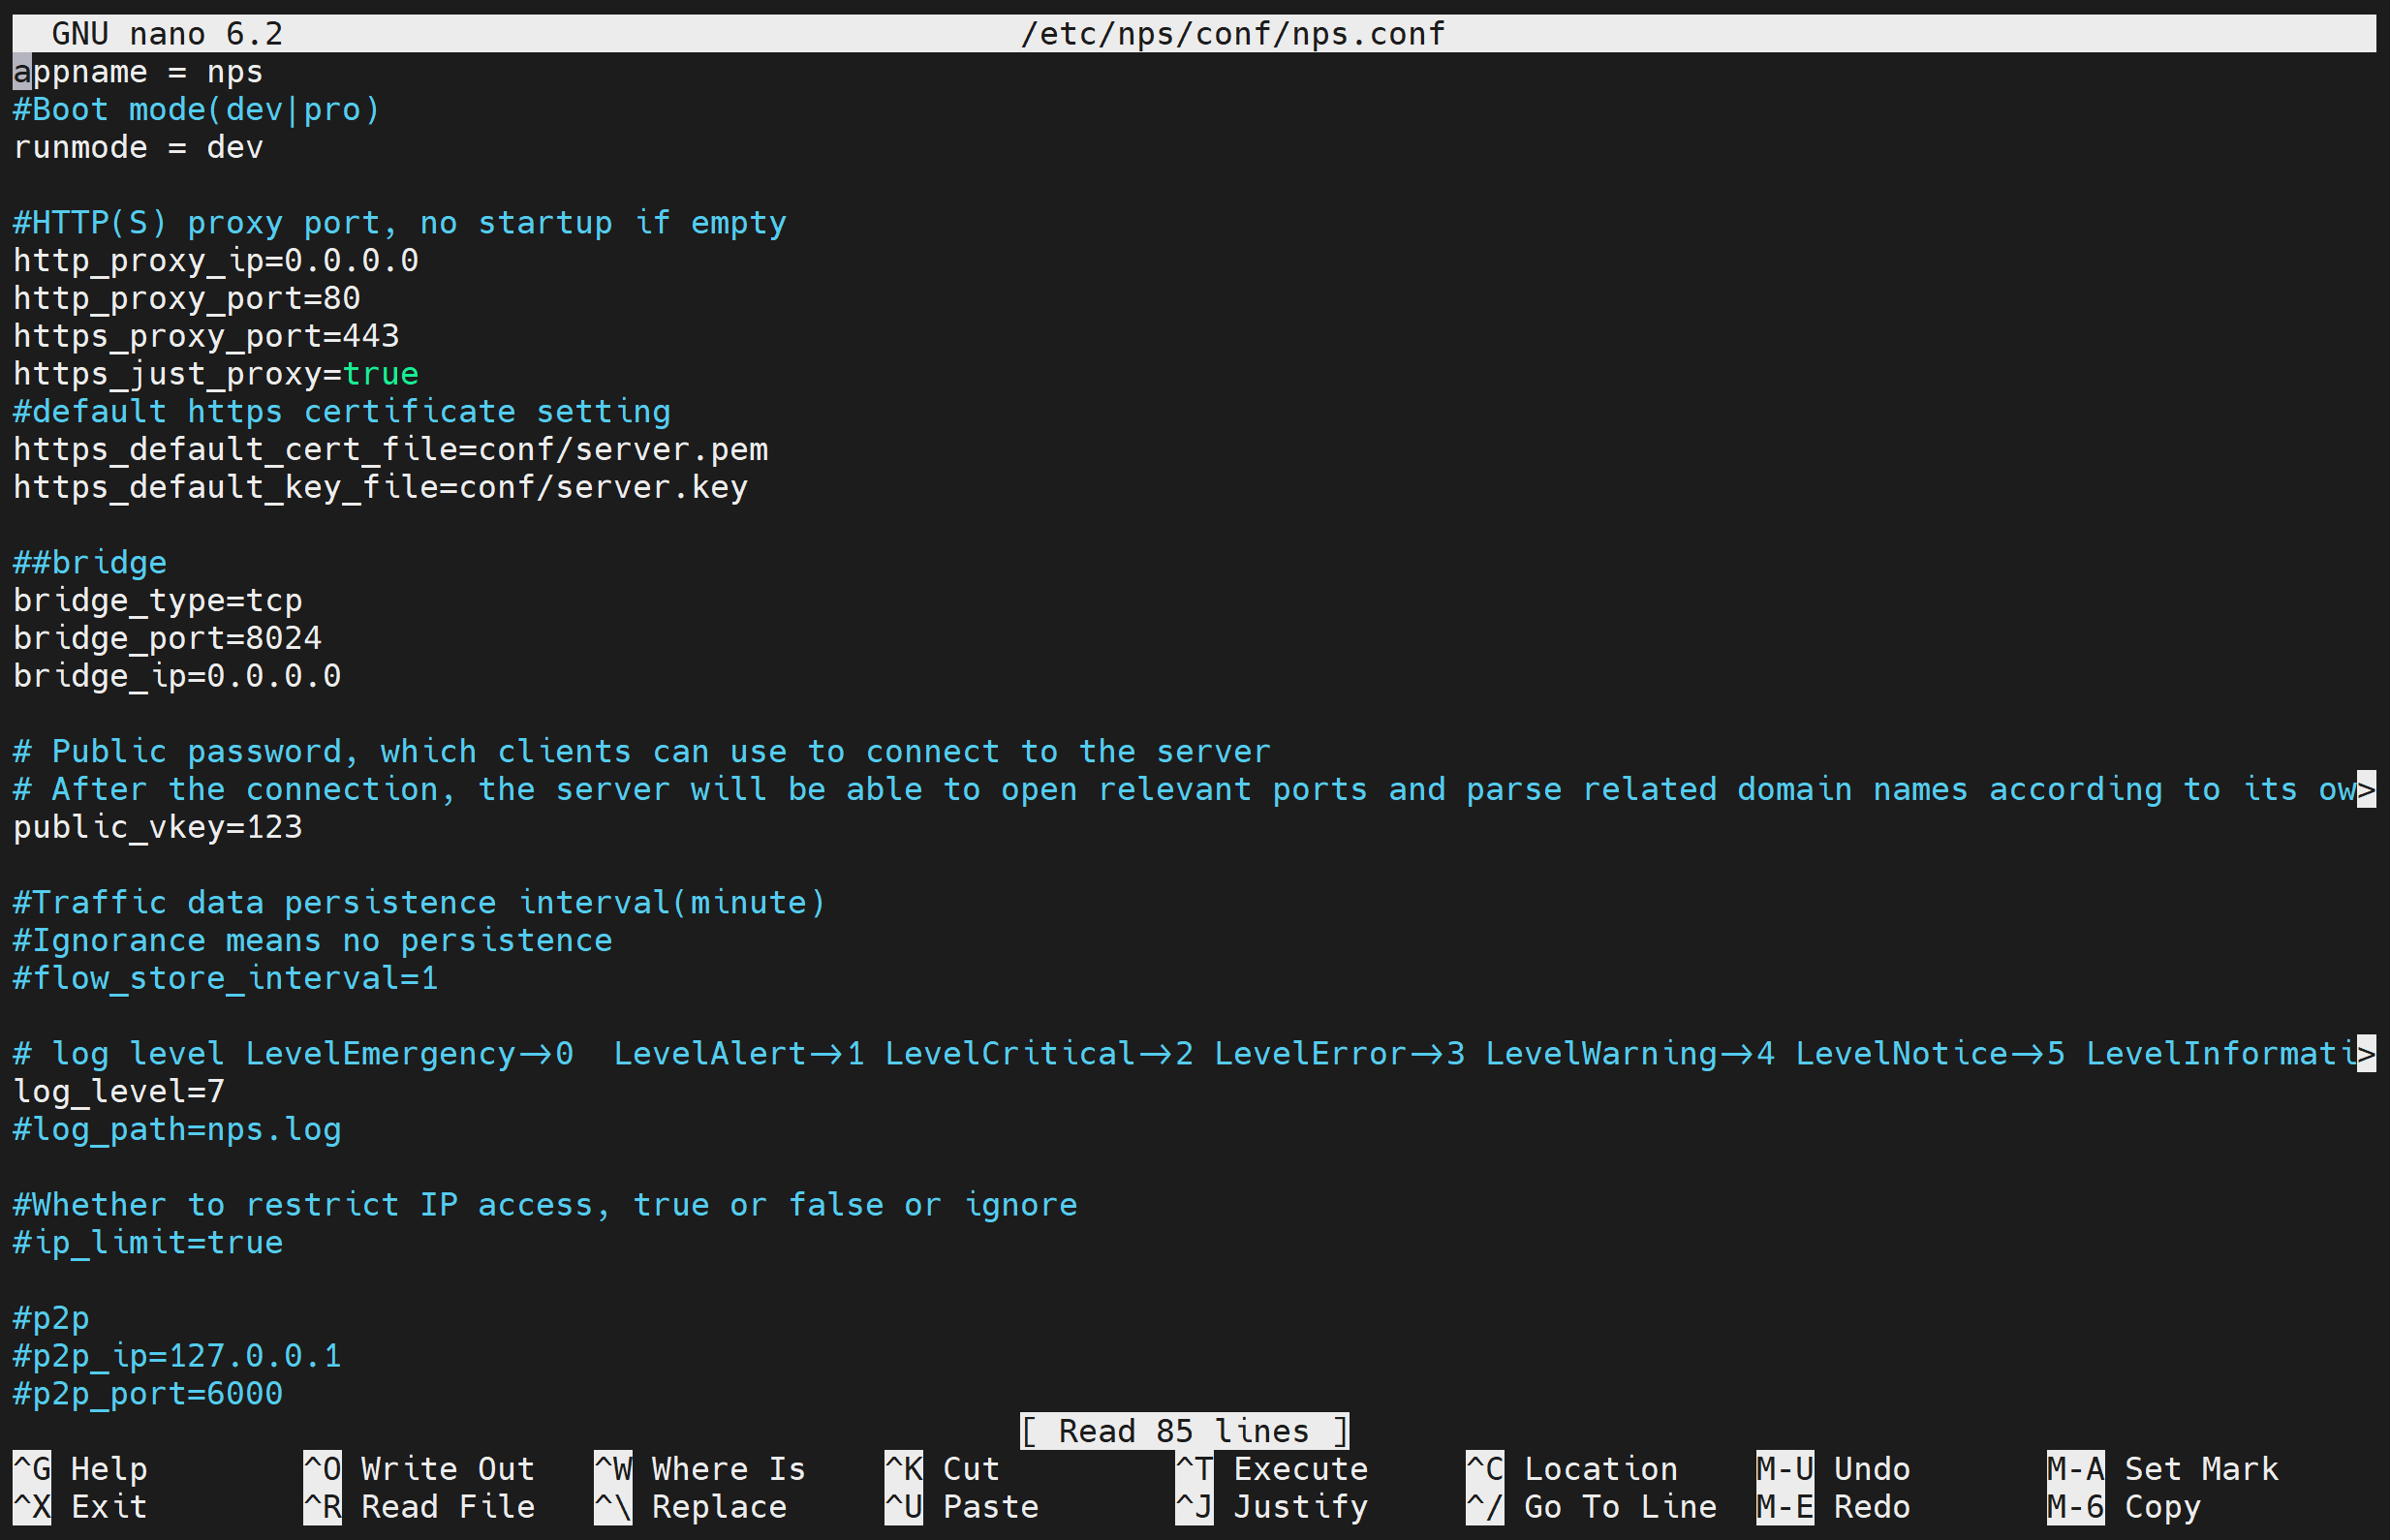
配置文件位于:/etc/nps/conf/nps.conf

nano /etc/nps/conf/nps.conf修改配置文件

https://cdn.ziyourufeng.eu.org/51hhh/img_bed/main/img/2025/02_21/image_b3381425e3fa66b0ca6bd8aa5badc730.png

web_port web管理端口
web_password web界面管理密码
web_username web界面管理账号

一般注意这几个即可

以Docker部署服务端

docker拉取镜像:

命令:docker pull ffdfgdfg/nps(现已404,有很多二开仓库,可以更换其他项目)

下载conf

到github下载conf文件夹

ehang-io/nps: 一款轻量级、高性能、功能强大的内网穿透代理服务器。支持tcp、udp、socks5、http等几乎所有流量转发,可用来访问内网网站、本地支付接口调试、ssh访问、远程桌面,内网dns解析、内网socks5代理等等……,并带有功能强大的web管理端。a lightweight, high-performance, powerful intranet penetration proxy server, with a powerful web management terminal. (github.com)

nps.conf中将https_just_proxy设置为true,并且打开https_proxy_port端口,然后nps将直接转发https请求到内网服务器上,由内网服务器进行https处理

1
2
3
4
5
6
7
8
9
10
11
12
13
14
15
16
17
18
19
20
21
22
23
24
25
26
27
28
29
30
31
32
33
34
35
36
37
38
39
40
41
42
43
appname = nps
runmode = dev

http_proxy_ip=0.0.0.0
http_proxy_port=20000
https_proxy_port=20001
https_just_proxy=true

https_default_cert_file=conf/server.pem
https_default_key_file=conf/server.key

bridge_type=tcp
bridge_port=20002
bridge_ip=0.0.0.0

public_vkey=123

log_level=7

web_host=a.o.com
web_username=admin
web_password=admin
web_port = 20003
web_ip=0.0.0.0
web_base_url=
web_open_ssl=false
web_cert_file=conf/server.pem
web_key_file=conf/server.key
auth_crypt_key =1234567887654321
allow_user_login=false
allow_user_register=false
allow_user_change_username=false
allow_flow_limit=false
allow_rate_limit=false
allow_tunnel_num_limit=false
allow_local_proxy=false
allow_connection_num_limit=false
allow_multi_ip=false
system_info_display=false
http_cache=false
http_cache_length=100
http_add_origin_header=false

名称 含义
web_port web管理端口
web_password web界面管理密码
web_username web界面管理账号
web_base_url web管理主路径,用于将web管理置于代理子路径后面
bridge_port 服务端客户端通信端口
https_proxy_port 域名代理https代理监听端口
http_proxy_port 域名代理http代理监听端口
auth_key web api密钥
bridge_type 客户端与服务端连接方式kcp或tcp
public_vkey 客户端以配置文件模式启动时的密钥,设置为空表示关闭客户端配置文件连接模式
ip_limit 是否限制ip访问,true或false或忽略
flow_store_interval 服务端流量数据持久化间隔,单位分钟,忽略表示不持久化
log_level 日志输出级别
auth_crypt_key 获取服务端authKey时的aes加密密钥,16位
p2p_ip 服务端Ip,使用p2p模式必填
p2p_port p2p模式开启的udp端口
pprof_ip debug pprof 服务端ip
pprof_port debug pprof 端口
disconnect_timeout 客户端连接超时,单位 5s,默认值 60,即 300s = 5mins

/root/nps/conf目录下放置配置文件,然后启动

1
docker run -d -p 20000-20010:20000-20010 -v /root/nps/conf:/conf --name=nps ffdfgdfg/nps

客户端

系统服务保活

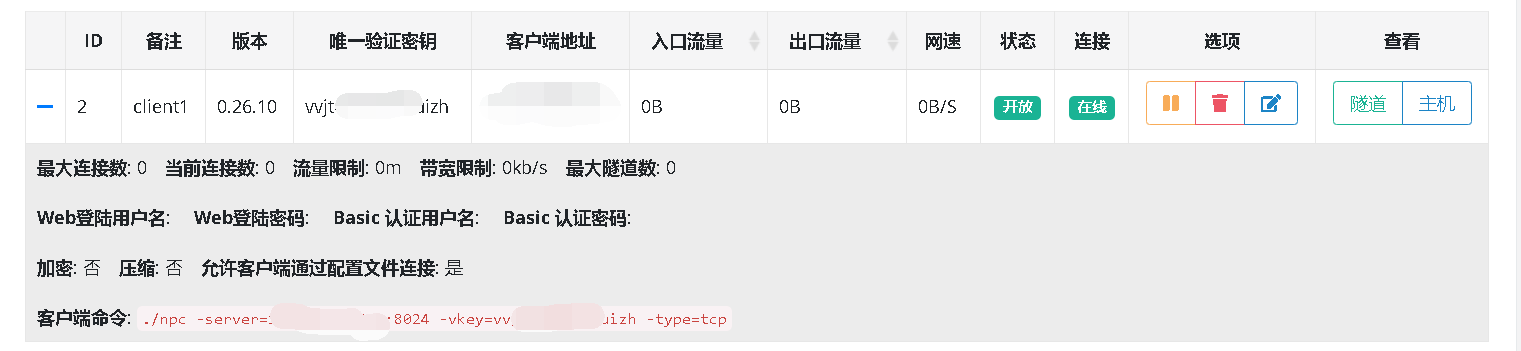
在服务端添加客户端,会生成对应的启动命令

https://cdn.ziyourufeng.eu.org/51hhh/img_bed/main/img/2025/02_21/image_941d29a8088bfbf32146c47bd263e0eb.png

使用 nohup 命令

nohup 命令可以使进程忽略 SIGHUP 信号,即使终端关闭,进程也会继续运行。

1
nohup npc -server=... -vkey=... -type=tcp > /dev/null 2>&1 &
  • nohup: 调用 nohup 命令。
  • >: 重定向标准输出。
  • /dev/null: 一个特殊的设备文件,所有写入它的数据都会被丢弃。
  • 2>&1: 将标准错误重定向到标准输出。
  • &: 将进程放入后台运行。

https://cdn.ziyourufeng.eu.org/51hhh/img_bed/main/img/2025/02_21/image_15082fde3df57359cbab51e473d66fe5.png

由于在后台运行,如需要关闭ps aux | grep npc查找叫npc的进程,找到对应的PID,使用kill npc对应的PID杀死npc进程。

给与权限

1
chmod +x start.sh

使用systemd服务

创建一个systemd服务,这样nps就可以作为系统服务运行,不受终端关闭的影响。

创建服务文件

1
sudo nano /etc/systemd/system/nps.service
1
2
3
4
5
6
7
8
9
10
11
12
13
[Unit]
Description=Natapp Client Service
After=network.target

[Service]
User=your_user # 替换为你的用户名
WorkingDirectory=/path/to/npc # 替换为 npc 所在的目录
ExecStart=/path/to/npc/npc -server=... -vkey=... -type=tcp
Restart=on-failure

[Install]
WantedBy=multi-user.target

启用并启动服务

1
2
sudo systemctl enable nps.service
sudo systemctl start nps.service